Introduction to Jupyter Notebooks (in VSCode)#
Welcome! This notebook will introduce you to Jupyter Notebooks, explain how to use them inside VSCode, and walk you through some important features for coding, formatting, and sharing your work.
From Programming Foundations and Biomolecular Programming, you already know how to write Python code in .py files. Jupyter notebooks basically allow you to mix code and formatted text in the same document, which is great for explaining your thought process or writing reports.
Of course, we will be writing the notebook code cells in Python, but it’s useful to note that Jupyter supports dozens of other languages, like Julia, Java, R, Matlab, and much more.
They’re super practical, and we will now show you now how to use them :)
'''
If you cannot see the Markdown (text) cells in this notebook, make sure you choose to 'trust' this notebook
in the pop-up that appears when you first open it.

If there was no pop-up or you missed it, then open your terminal and:
    1. navigate to the directory with this notebook:
        `cd Python_assignments/Introduction_to_Jupyter_Notebook`
    2. run:
        `jupyter trust Intro_to_Jupyter_Notebook.ipynb`
'''
How to create a Jupyter Notebook in VSCode#
Creating a Jupyter Notebook in VSCode is as simple as:
Opening VSCode.
Navigating to the folder where you want the file to be.
Creating a new file with the extension
.ipynb.
VSCode will automatically open it as a notebook!
–> You can also use File > New File, then select the file type to be Jupyter Notebook.
Selecting a Kernel#
When you open a .ipynb file, VSCode may ask you to ”Select a kernel.” A kernel is the computational engine that runs your code.
When you run a code cell, the kernel executes it and returns the result.
The kernel stores the current state of all your variables and imports.
You should select your current Python environment — usually the same one you use for .py scripts. Look at the top right of your notebook for the kernel selector dropdown, and select the appropriate one.
Creating a cell#
In Jupyter Notebooks, you can create either code cells or Markdown cells. The former are where you will write your code, and the latter your formatted text. We will get to Markdown further down in this notebook.
To create a new cell, you can click either button ”+ Code” or ”+ Markdown” at the top of the notebook. This will add either a code or markdown cell right below the cell you currently have selected.
You can also hover your mouse between two cells, and you should see those same two buttons appear. This will insert a cell of the type you choose between the two cells.
–> Note that you can also drag cells around to change their order! For a code cell, click and hold to the left of the cell to drag it. For a Markdown cell, make sure the cell is rendered first, then you can click and hold anywhere on the cell to drag it around.
Running Cells#
There are a few keyboard shortcuts to run code cells in Jupyter Notebooks. These are the same shortcuts you use to render a markdown cell after editing it. Try it now! Double click on this cell to edit it, and then try any of the three shortcuts listed below to render it.
Press
Shift + Enterto run the current cell and move to the next.Press
Ctrl + Enter(same on Mac) to run and stay in the same cell. This is useful if you want to run the same cell many times.Press
Alt + Enter(orOption + Enteron Mac) to run the cell and insert a new one below.
–> You can also click the “play” button on the top left of any cell to run that particular cell, or the ‘Run all’ button at the top of the notebook to run all the cells in the notebook.
# Try the shortcuts on this code cell, too!

a = 3
print(a)
3
Restarting or Interrupting the Kernel#
Sometimes, your code runs forever or crashes — that’s okay! You can simply interrupt the current code cell that’s running, or restart your kernel.
To interrupt a cell: click the ”Interrupt” button with a square icon at the top of the notebook, or to the left of a code cell, where the “play” button was. (Of course, these buttons only appear when a cell is running).
To restart the kernel: click the ”Restart” button at the top of the notebook with the circular arrow icon.
Note that restarting your kernel clears all variables and starts fresh. You’ll need to rerun any setup cells (e.g. imports and variable definitions) before you can pick up where you left off.
Let’s test all this below.
# Run this cell
# This is an infinite loop, so we will never print 'target'
# Interrupt the cell whenever you want.

count = 1
target = 0

while count < 100:
    target += 1

print(target)
# We defined a variable a few blocks above: a
# We can print it now:

print(a)

# Run this cell to print a.
3
Now, restart the kernel, and try running the code cell right above again. You will see that a is no longer defined, because the kernel was restarted and thus, all variables cleared. You’ll need to rerun the code cell that defined a in the first place to store its value in the kernel again.
Clearing Cell Outputs#
Sometimes, a cell’s output is very long, and you don’t feel like scrolling through it every time to reach the bottom of your notebook. Then, you can collapse the output of your cell by double-clicking on the space to the left of the cell output. Double-click again to uncollapse the output.
Other times, you might want to clear the output altogether, to ensure the output does not appear on your final report after converting the notebok to a PDF (which you will learn how to do below), or just prepare your notebook for submission. Then, you can simply clear the output of one (or multiple) cell in the following way:
Click on the three horizontal dots that appear at the top left of the cell output and choose ”Clear Cell Outputs” to clear the output of that particular cell
Or click the button at the top of the notebook to clear the outputs of all cells: ”Clear All Outputs”
# Let's test collapsing and clearing cell outputs here
# We will now print a long output:

for i in range(100):
    print(i)
Debugging a cell#
You learned how to use VSCode’s debugger in the Programming Foundations course. You can still put those skills to good use in Jupyter Notebook! To do so, simply:
Set your breakpoints by clicking in the left margin of a notebook cell
Click the drop-down menu arrow next to the “play” button at the top left of a code cell (only appears when that cell is selected) and select the ”Debug Cell” button.
You can now use the Debug View, Debug Console, and Debug Toolbar as you did in your other .py scripts in VSCode!
If you need a refresher on how the VSCode debugger works, check out this video: https://code.visualstudio.com/docs/introvideos/debugging
# Test the debugger here

def sum_of_squares(n):
    total = 0
    for i in range(1, n):  # <- bug: should be range(1, n+1)
        square = i ** 2
        total += square
    return total

# Expecting the sum of squares from 1 to 5: 1² + 2² + 3² + 4² + 5² = 55
result = sum_of_squares(5)
print("Result:", result)  # Returns 30 instead of 55
Result: 30
Installing Packages in a Notebook#
You can still install packages in Jupyter Notebook using pip, but now you do it inside a cell, like so:
!pip install numpy matplotlib
The
!tells the cell to run a shell command (i.e., as if it were in the terminal).You only need to install packages once per environment.
Try it now in the cell below:
# Try installing a package here (it’s safe to re-run even if it’s already installed)
!pip install matplotlib

# Here is also an example of a cell output you'd want to clear
# before submitting your notebook or converting it to a PDF
Writing Markdown#
Next to the code cells, you have the Markdown cells. Markdown is a simple markup language that allows you to write formatted text using a plain-text editor. You basically write plain text files in a way that looks “good” to a human, but that can also be easily understood by a computer. Jupyter Notebook markdown cells then render the markdown language for you.
Here’s some basic Markdown syntax:
1. Titles and Headings#
# Big Title
## Section Title
### Subsection
#### Sub-subsection, even
2. Styles#
*Italic* or _Italic_
**Bold** or __Bold__
`Monospace code`
3. Lists#
- Bullet point
- Another one

1. Numbered list
2. Like this
Separator#
Written with three consecutive dashes, like so:
---
Text color#
Technically, Markdown doesn’t allow you to change the color of text, but some Markdown processors, like Jupyter Notebook, support HTML! This means that we can use an HTML tag to change the color of text in our Markdown cells, like so:
<font color="red"> This text is red!</font>
Which will output: This text is red!
Make sure you don’t use Markdown inside HTML tags. So, if you want to make text bold font and colored, you have to write the asteriks outside of the HTML tags, like so:
**<font color="red"> This text is bold font and red!</font>**
Which will output: This text is bold font and red!
Your Turn!#
Create a markdown cell below this one, and experiment with the syntax we’ve given you above. You can always look up more syntax online, if you’re curious!
Here’s a link to the Markdown Guide for basic syntax: https://www.markdownguide.org/basic-syntax/
Similarly to the text color HTML tag, other useful HTML tags to work around Markdown’s limitations (such as underlining text can be found here: https://www.markdownguide.org/hacks/
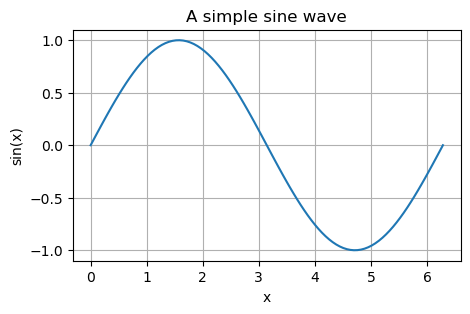
Plotting Graphs#
We’ll make a simple plot using matplotlib so you can see how the output looks in a Jupyter Notebook.
import matplotlib.pyplot as plt
from matplotlib.pyplot import figure
import numpy as np

x = np.linspace(0, 2 * np.pi, 100)
y = np.sin(x)

figure(figsize=(5,3))
plt.plot(x, y)
plt.title("A simple sine wave")
plt.xlabel("x")
plt.ylabel("sin(x)")
plt.grid(True)
plt.show()
Adding Images#
You can also embed images in your Jupyter Notebook via a code cell, using matplotlib.image. See below:
import matplotlib.pyplot as plt
import matplotlib.image as mpimg
from matplotlib.pyplot import figure

image = mpimg.imread("test_image.png")  # Use the path to your image here

# Set the figure size here
figure(figsize=(3,3))
# You cannot distort images, so both values need to be the same for resizing to work

plt.title("This is an apple", fontsize=14)  # You can add a title
plt.axis('off')  # Remove graph axes

plt.imshow(image)  # Tells matplotlib what to show

plt.show()  # Tells matplotlib to actually render the plot
    # This last line is not necessary in an interactive environment like Jupyter Notebook,
    # but it removes the ugly line of "<matplotlib.image.AxesImage at 0x13145a0d0>"
Saving Your Notebook as a PDF#
Great, now that you are an expert on Jupyter Notebooks, you are ready to learn how to export one into a PDF document! Let’s try it with this notebook. Of course, first check your cell outputs, to make sure any (and only) results you want to be showing are there.
Exporting to HTML and saving to PDF#
The easiest way to save your Jupyter Notebook to PDF is by exporting it to HTML. To do so, follow these steps:
In your notebook, click on the three horizontal dots at the right of the menu on top of your notebook.
Choose “Export” >”HTML”. You will see an option to export to PDF as well, but this requires having a full TeX (LaTeX) environment installed on your computer, which takes up a lot of space and is trickier to install, so we will not cover this option. You can also export to
.py!Open the saved .html file (it will open in your browser).
VSCode should prompt you right after exporting to HTML if you want to open the file already.
“Print” the page to PDF:
For Windows users:
Open the print menu by pressing
Ctrl+P.Under the “Printer” drop-down menu, select “Microsoft Print to PDF” or “Save as PDF”. (The exact wording may vary by browser.)
When prompted, choose where you want to save the file.
On Mac:
Open the print menu by pressing
Command+Por by navigating to “File” > “Print”…In the “Destination” drop-down menu, select “Save as PDF”. Or, if using Safari, simply click the “PDF” button on the bottom left of the print menu.
When prompted, choose where you want to save the file.
Try it now!#
Try saving this notebook as a PDF!
Note this about code cells: While in Markdown cells, text wraps if it exceeds the margins of the PDF page, text in code cells will not do that. So, if you want everything to show up on your final PDF, make sure not to write code lines that are too long. You will see what this means with the code cell below, after you export to HTML and save to PDF.
# This is a very long line of code written as a comment which will definitely get cut off when exporting to HTML and saving as PDF

# To remedy this, divide long lines of code over multiple lines, like so:
    # This is a very long line of code written as a comment which will definitely
    # get cut off when exporting to HTML and saving as PDF
Summary#
You now know how to:
Create a Jupyter notebook in VSCode
Select a kernel and install packages
Write basic Markdown syntax and some HTML workarounds
Run code cells and view output
Restart the kernel and clear cell outputs
Use the VSCode debugger in Jupyter Notebook
Export your notebook to PDF or
.py
You’re ready to write and share beautiful, interactive Python notebooks!
Happy coding!