from IPython.core.display import HTML
def set_width(width):
    display(HTML(f"""<style>
            .container {{ width:{width}% !important;
                            min-width:800px !important; margin: 0 auto}}
            .jp-Cell {{ width:{width}% !important;
                            min-width:800px !important; margin: 0 auto}} </style>"""))
# Set container width to X% of the fullscreen
set_width(50)
intro power supply Agilent#
This intro supports labmanual 1A
Watch the following movie clip to get introduced to the power supply, focus on the part between 2:00 and 3:40:
Also have a look at the quick start manual: https://int.siglent.com/upload_file/user/SPD3000C/SPD3303C_Quick_Start_QS0503C-E01B.pdf
or the service manual: https://www.siglenteu.com/wp-content/uploads/dlm_uploads/2023/04/SPD3303C-Service-Mannual_E01B.pdf
## SCR-power-supply, focus on the part between 2:00 and 3:40

from IPython.lib.display import YouTubeVideo
YouTubeVideo('4dyK8UgrqKQ', width = 600, height = 450)
Tripple power supply - basics#
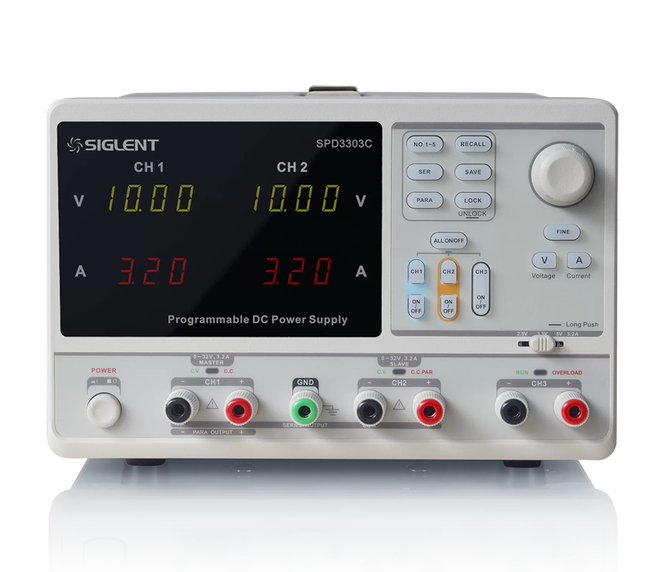
Power up the device, and for each channel (you will use) make sure to set a maximal current (0.10A):
push on A for selecting current (the ‘A’ button will light up)
select the channel (CH1, CH2)
turn the knob, and limit the current to 0.10A
note: if your current limit is 0 A, the warning light C.C. will switch on, as you direclty reach the max current set. Hence it is better to set a (low) current maximum.
Select the wanted output voltage:
press V for Voltage
select the channel (CH1, CH2)
turn the knob to adjust the voltage
for CH3: Use the slider just above the CH3 connectors for selecting 2.5, 3.3 or 5V.
Establish all connections:
red wire for the signal: the + of CH1, CH2, or CH3
black wire goes to - (common ground)
The GND is used to ground the chassis (case) of the device, in order prevent charge on the outside case of the device when malfunctioning. This only works when using a power cable and wallcontact with ground.
Switch on the signal:
Push ON/OFF, underneath the button CHq/CH2/CH3.
When highlighted it is on, and you see the supplied voltage and current.
C.V. means constant voltage, meaning the max voltage is reached.
C.C. means constant current, meaning the max current is reached.
Maximum output:
CH1, CH2: Voltage 0-32 V
CH3: 2.5, 3.3 or 5V.
CH1, CH2, CH3: 0-3.2 A
Tripple power supply - series and parallel#
The parallel setting you will hardly use, but in some cases placing CH1 and CH2 in series might come in handy. For example when you have to input +12 V, -12 V and 0 V (the middle of -12V and +12 V)
SER = serial#
You can double the maximum output voltage, by placing CH1 and CH2 in series (internally):
Pressing SER (top middle of front panel)
Internally a connection is made between CH1+ and CH2-
You connect your load (for example multimeter) to CH1- and CH2+.
PARA = parallel#
This you will never need, but it is possible to set CH1 and CH2 in parallel to double the maximum current.
Pressing PARA (top middle of front panel)
internally CH2 is placed parallel to CH1
you connect to CH1 only, and can go up to double current with respect to one channel.